14 Points Ww1 Drawings for Projects Easy
Photographs
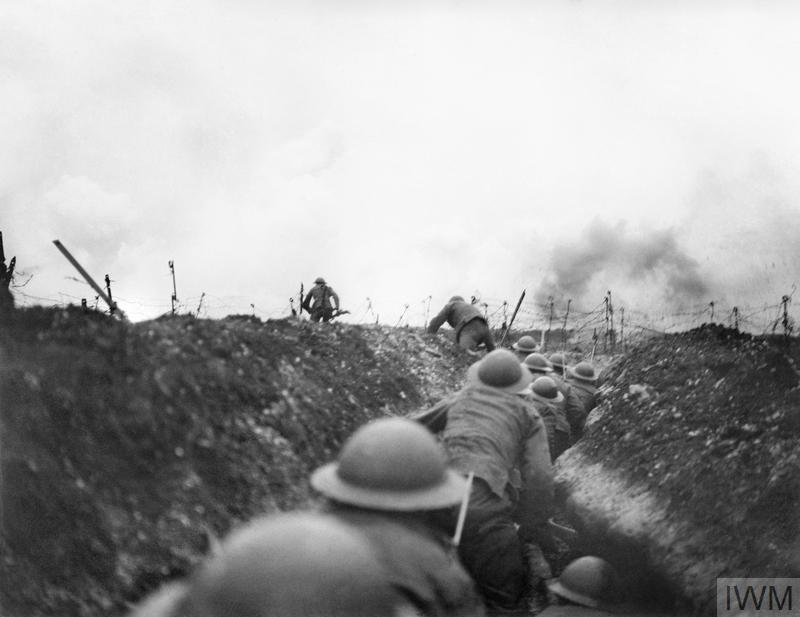
Open Warfare
This photograph shows men of the 1st Battalion, Middlesex Regiment, 19th Brigade, coming under shrapnel fire from German artillery during the Battle of the Marne on 8 September 1914. The high number of casualties suffered on all fronts during 1914 came as a huge shock to everyone involved in the First World War.

Photographs
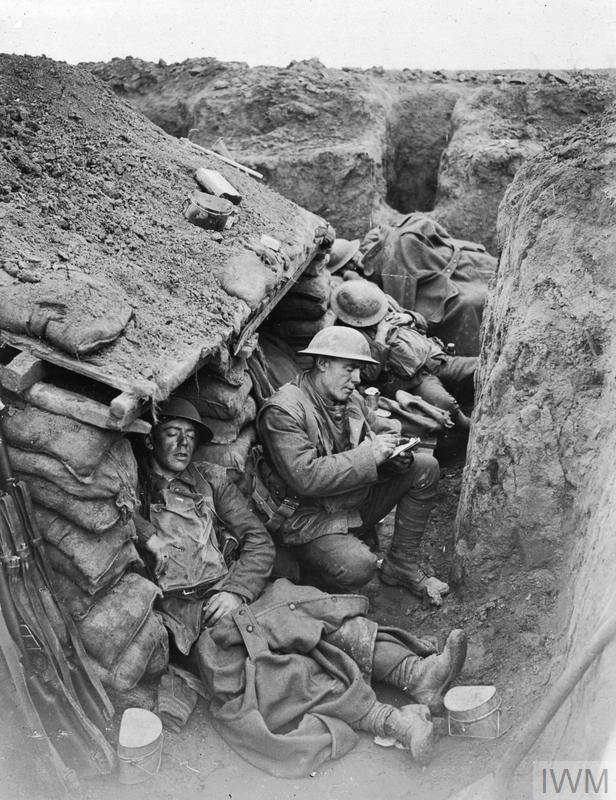
Trench Warfare
Photographs
Trench Warfare
The terrible casualties sustained in open warfare meant that trench warfare was introduced very quickly. Trenches provided a very efficient way for soldiers to protect themselves against heavy firepower and within four months, soldiers on all fronts had begun digging trenches. This photograph shows French infantry manning a forward line of trenches in Lorraine during January 1915.

Photographs
The British Army on the Western Front
Photographs
The British Army on the Western Front
Although trenches protected soldiers in them they also led to a state of deadlock. Trench systems developed significantly over the course of the war. This photograph was taken in 1917 and shows a sentry from the Lancashire Fusiliers looking through a box periscope to observe No Man's Land and avoid being seen himself.

Weapons and ammunition
Webley .455 Mark 6 (VI military)
Weapons and ammunition
Webley .455 Mark 6 (VI military)
Service revolvers were initially only carried by officers, but as the war progressed they were issued more widely. The Webley was the standard British service revolver during the First World War, they were robust and powerful weapons and remained in use until 1932. This revolver belonged to 2nd Lieutenant J R R Tolkien who went on to write The Hobbit and The Lord of the Rings. Tolkien joined the Lancashire Fusiliers in 1915 and went on to serve in the front line trenches of the Somme. The impact of the Battle remained with him for the rest of his life and its influence can be clearly seen in his unique mythological world and stories.

The first Trench Raids took place in 1914 and were seen as a good way of maintaining an 'offensive spirit' during the stalemate of trench warfare. During trench raids, soldiers would aim to kill the enemy, take prisoners and gather information. Soldiers carried specialised weapons, like knives and knuckledusters, during these raids, but also improvised weapons like this trench club. In this interview Private Cecil Tubbs talks about the tactics used during Trench Raids.
Art
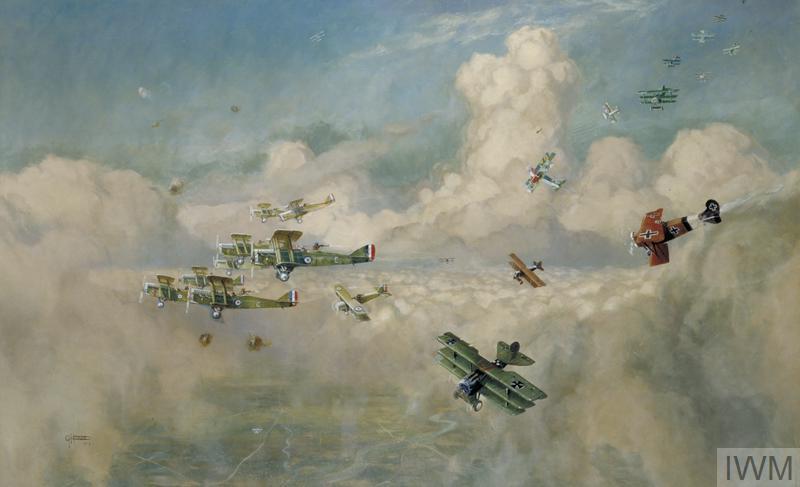
Heavy Artillery by Colin Gill
Art
Heavy Artillery by Colin Gill
With the development of trench warfare, increasingly large artillery was developed to fire high explosive shells and smash enemy trenches, like this battery of 9.2 inch howitzers. The majority of casualties on the Western Front were caused by artillery shells, explosions and shrapnel.

Weapons and ammunition
25 cm Minenwerfer (Heavy Trench Mortar)
Weapons and ammunition
25 cm Minenwerfer (Heavy Trench Mortar)
The German 'Minenwerfer' terrified Allied soldiers. It fired heavy bombs which could be seen slowly tumbling from the sky. When they struck, they demolished or buried everything around them. This particular mortar was captured by the 31st (Alberta) Battalion, 2nd Canadian Division, during the fighting for Vimy Ridge, 9th April 1917.

Photographs
A Shell Burst
Photographs
A Shell Burst
The sustained use of artillery not only led to heavy casualties, but also other kinds of trauma, and it was during the First World War that psychological trauma or 'shell shock' was first recognised as an effect of modern warfare. This photograph shows a shell bursting within ten yards of the photographer during the Battle of Passchendaele on 23 September 1917.

Photographs
Battle of the Somme
Photographs
Battle of the Somme
Artillery bombardments were designed to destroy enemy guns, cut through dense barbed wire and blast men from the trenches. Often, however, they did not succeed in these objectives. On 24 June 1916 1500 British guns began a week long bombardment to smash German defences on the Somme before the infantry attacked. Many of the shells they fired, however, were duds and when the infantry advanced it soon became clear that the artillery bombardment had failed. German troops emerged and gunned down advancing British infantry, killing 20,000 on 1 July alone.

Photographs
Tunnelling and mines
Photographs
Tunnelling and mines
Tunnelling was used by both sides to try and dig beneath enemy trenches and lay large volumes of explosives. Tunnellers faced many dangers including the use of poison gas, hand-to-hand combat with enemy tunnellers and the threat of being buried alive. This image shows a mine exploding underneath the German front line positions at Hawthorn Redoubt. It was detonated 10 minutes before the first day of the Battle of the Somme, 1 July 1916. With 45,000 pounds of explosives, the mine caused a crater 130 feet across by 58 feet deep.

Weapons and ammunition
The Vickers Machine Gun
Weapons and ammunition
The Vickers Machine Gun
The Vickers machine gun was first used by the British Army in 1912 and during the First World War they became central to British infantry tactics. From October 1915 onwards they came under the control of a new unit called the Machine Gun Corps, which developed sophisticated new tactics for the Vickers. They grouped guns together to fire barrages – often shooting over the heads of friendly troops. British soldiers soon found the rush of machine-gun bullets passing overhead comforting rather than frightening.

Photographs
Body Armour
This photograph shows a British soldier trying on a suit of German body armour. Soft uniforms offered very little protection against the dangers of trench warfare and thousands of men died as a result of wounds that they might otherwise have survived if they had worn better protective personal equipment. Body armour was mainly used on an individual basis and was never universally issued by the army, because if it was thick enough to be effective, it stopped the wearer from moving freely.

Photographs
Live and let live
Photographs
Live and let live
On rare occasions, unofficial truces would occur between trenches. This image shows British and German soldiers during the infamous 'Christmas Truce', which was widespread but not total across the Western Front, on Christmas Day 1914. Although instances such as this were rare, in quieter spots on the front, the armies were known to break from the intensity of continuous fighting in order to repair trenches or collect dead and wounded soldiers.

Art
The Menin Road by Paul Nash
Art
The Menin Road by Paul Nash
Fighting in and around the trenches was often a terrifying experience as illustrated in this painting by Paul Nash. It shows a devastated battlefield pocked with rain-filled shell-holes, flooded trenches and shattered trees. The foreground is filled with concrete blocks, barbed wire and corrugated iron, while columns of mud from artillery fire rise up in the background.

Paul Nash, 'The Menin Road' (1919).
Fighting in the Trenches
Find out more about the experience of fighting in the trenches from Phil Dutton, one of Imperial War Museums curators. This video includes archive film footage of soldiers in the trenches.
Downloads
-
Fighting in the trenches
Powerpoint


Source: https://www.iwm.org.uk/learning/resources/fighting-in-the-trenches
Post a Comment for "14 Points Ww1 Drawings for Projects Easy"